


Blog
Supplies You’ll Need
When you’re getting ready to paint a stone fireplace, you’ll want to be careful about the type of paint you’re purchasing. Stone paint updates the color while keeping the look of real stone. This way, you’re not flattening it out. Your fireplace gets a facelift while maintaining its character.
In addition to stone paint, you’ll need:
- Painter’s tape
- A drop cloth or an old sheet
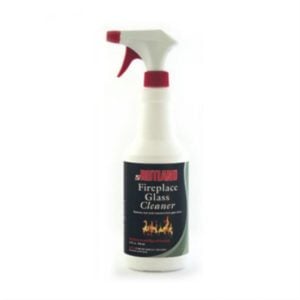
- A fireplace cleaner or mild liquid dish soap mixed with warm water
- A good scrubbing brush
- Paintable acrylic latex caulk (if there are cracks too big to be painted over)
Step 1: Prepare the Work Area
Preparing the work area is simpler than it sounds. Simply gather your supplies, clear the area of any decorative items, wood, tools, or fireplace screens, and use painter’s tape and drop cloth to section off any areas that need protecting. Tape the drop cloth to the floor around the fireplace to avoid drips. You’ll also want to tape around the mantel.
Step 2: Clean the Fireplace’s Surface
Next, you’ll want to break out your cleaner and brush and scrub the surface of your fireplace. Once it’s dry, check for cracks. Small ones are fine to paint over, but bigger ones will need to be filled in with the caulk we mentioned. If you have to fill some larger cracks before breaking out the stone paint, give the caulk enough time to dry before moving on to the next step.
Step 3: Choose Your Paint
As we mentioned earlier, it’s important to choose paint for stone, not just any ordinary paint. You can apply stone paint over previously painted stone just as easily as over stone that’s never been painted before.
Our stone fireplace paint kit contains everything you need to quickly transform your old fireplace into something new. In the kit, you’ll find base coat sealer, paint, a paint brush and tray, rollers, a sponge, and painter’s tape. Everything is pre-tested and pre-mixed, so it’s ready to use.
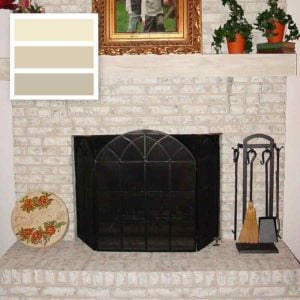
Your color options include:
- Frosted sunshine: a mix of tan, gray, and yellowish cream that works well with other light colors and makes bold colors pop.
- Misty harbor: a mix of light and medium grays with a subtle touch of cream that works well with gray carpeting or furniture and other cool color tones.
- Twilight taupe: a mix of taupe, tan, beige, and cream that resembles natural sandstone. Easy to match to most color and décor schemes.
Step 4: Paint the Fireplace
Now we’re getting to the good stuff! Your fireplace is prepped and clean, and you have your color. All that’s left to do is seal and paint. Pour some base coat sealer into your paint tray, dip and coat your roller evenly, and then work the roller over the fireplace’s surface from top to bottom. Use a brush to cover edges, corners, and tight spaces.
The sealer will help prevent your paint from soaking in and drying unevenly. It’ll also help prevent the old color from bleeding through and protect against rusting and peeling. Once your sealer is completely dry, follow the same steps with your stone paint; roll from the top down, use a brush to cut in around edges, cover corners, and dab into tight spaces.
For optimal results, paint for stone may require two coats. Allow your first coat to dry before you evaluate the color.
Step 5: Clean Up
Congratulations! You’ve upgraded your living space and saved thousands on renovations. But you’re not finished just yet. While it may be tempting to leave the cleanup for later, the longer painter’s tape stays on, the harder it is to remove. Remove it cautiously at a 45-degree angle so it doesn’t damage your fresh paint.
Once the mantel is clear, do the same for your drop cloths. Handle them carefully, as they may have globs of paint on them. Lastly, close up and put away your paint cans and wash your brushes and tools with warm, soapy water, rinsing them thoroughly to preserve them for future projects.
Now that that’s out of the way, you can kick back and enjoy that fireplace!