








Free Shipping On Orders $199+ No-Hassle Returns Trusted By 130+ Happy Customers

How To Clean A Brick Fireplace: Step-By-Step

In this article, we’re going to cover everything you need to know on how to clean a brick fireplace. By the end of the steps below, you’ll have a fireplace you can be proud of.
A brick fireplace is a central feature of any room. It stands out as you walk in and helps place everything else together. The last thing you want is for your guests to walk into the room and see a fireplace full of soot and debris. Instead, you want a brick fireplace that always looks its best.

Like most other things in your home, a brick fireplace requires proper care and maintenance to keep it looking as sharp and good as new. This involves regular cleaning to remove the black soot and any other forms of dust and dirt.

Luckily, cleaning a brick fireplace isn’t a difficult job, and you can do it in just a few simple steps. Keep reading to find out the best ways on how to clean fireplace brick and how to keep it looking great all year round.

Materials and supplies you’ll need

Before you start cleaning your brick fireplace, you’ll need to gather the right materials and supplies. Ensure you get these exact items, as the wrong ones could damage your fireplace instead of cleaning it.

  • Rubber gloves: These are the best material gloves to protect your hands from the soot and any chemicals you may use
  • Dustpan and brush: Have a dustpan and brush ready to remove any debris and ashes inside and surrounding the fireplace
  • Plastic sheet: Some excess soot and dirt may appear when cleaning, so place have a plastic sheet to protect your floors and furniture
  • Chosen cleaning solution: There are several cleaning solutions you can use on your fireplace, so ensure you have your chosen one ready
  • Scrub brush: A scrub brush will scrub away any stubborn soot stains and dirt from the bricks
  • Sponges: You can use sponges to apply the cleaning solution and wipe away the grime from the surface
  • Bucket: Have a bucket ready for hot water or to mix your cleaning solution into
  • Protective eyewear and face mask: For guaranteed safety, these items will protect your eyes and lungs from soot and dust

Step-by-step guide to cleaning a brick fireplace

Once you have all your materials and supplies together, it’s time to start cleaning your fireplace. Follow these simple steps below:

1. Remove any dust, loose soot, and ashes

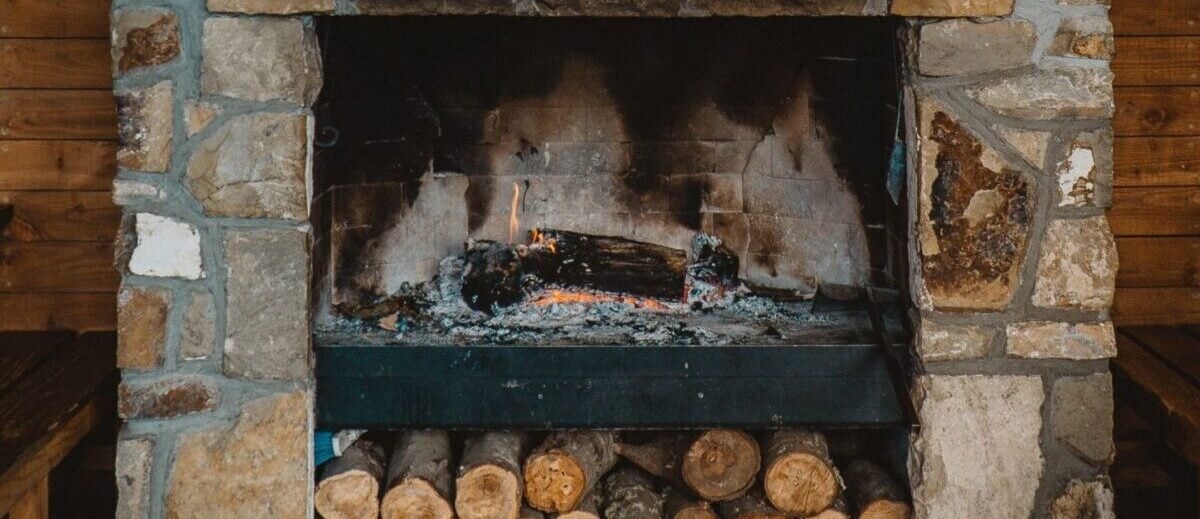
You need to prepare your brick fireplace before you start cleaning it. Make sure it hasn’t been lit for a while so there are no hot coals and it’s completely cold. You should then use your dustpan and brush to remove any excess dust, soot, and ashes.

2. Wipe your bricks with water

It’s now time to prepare your bricks. You want to ensure they are wet with water before you apply any cleaning solution. This is because the bricks will absorb the water as it is wiped on, which prevents your cleaning solution from doing the same, so it stays on the surface instead. The best way to wet your bricks is with one of your sponges or even a spray bottle if you have one handy.

3. Prepare your chosen cleaning solution

There’s no ‘one fits all’ cleaning solution when it comes to cleaning your fireplace, and it is all down to personal preference. However, the best one we have found is Brick Anew’s Brick and Stone Fireplace Cleaner. It is designed to eliminate the toughest residues, including smoke, soot, and creosote.

Other potential cleaning solutions include:

  • Dishwashing detergent
  • Vinegar
  • Scrubbing bubbles
  • Trisodium phosphate
  • Ammonia

4. Use your scrub brush

Apply your Brick Anew or alternative cleaning solution to your bricks. Brick Anew’s solution comes in an easy-to-use spray bottle, and you can also use an empty spray bottle to transfer your alternative. Work from top to bottom, applying to small areas at a time. Take your scrub brush and then scrub the surface in a circular motion. Keep going until the soot stains start to disappear, and the fireplace brick is clean.

5. Rinse and repeat

You don’t want to rinse all the fireplace bricks at once, so we suggested scrubbing in small sections. Once you’ve scrubbed one area, you can rinse it before you move to the next set of bricks. Use a wet sponge that has been dipped in clean water each time. Repeat this process until complete.

6. Look out for any remaining marks

You’ll now have a good idea of what your clean fireplace looks like. Hopefully, it looks good as new, but there may be a few stubborn marks that don’t seem to budge. If this is the case, you might want to mix a small bit of water with baking soda to make a solution. Apply it to the mark for a few minutes. You should then take a smaller scrub brush to go over the section and then rinse the area.

Cleaned Red Brick Fireplace

Frequently asked questions

Still have a couple of questions? We have the answers for you:

What is the best cleaner for a brick fireplace?

The best cleaner to clean fireplace brick, in our opinion, is the Brick Anew Brick and Stone Fireplace Cleaner. It is affordable, convenient, and known to remove even the toughest stains from your brick fireplace. It doesn’t contain any harmful acids, and it will help your fireplace look as good as new.

How do you remove black soot stains from a brick fireplace?

You can remove black soot the same way you remove any other dirt and grime from your brick fireplace. Ensure you follow the six steps listed above, starting by gathering all the correct equipment and supplies. Remember to protect your eyes and lungs by wearing protective gear, and repeat the process if you don’t see any results at first.

How often should I clean my brick fireplace?

There is no set answer to this question, as it will depend on how often you use your fireplace. If you use it regularly, you should try cleaning it every few months. However, if you only use it for special occasions, once a year will be sufficient.

How To Paint The Inside Of A Fireplace

If you’re battling with the inside of your fireplace looking dirty all the time, you’ve probably thought about painting it several times. But can you paint the inside of a fireplace? You absolutely can! 

The inside of your fireplace does not have to be a dark hole in the middle of the room. It can be a mission to keep clean, but when you use the right interior fireplace paint and paint the inside of your fireplace correctly, it can really add to the feature of the room and keep your fireplace looking sleek and chic. 

We’ve put together some simple steps you can follow on how to paint the inside of a fireplace to make it truly unique to your home. Using the right techniques and the right products makes the world of difference so make sure you do your shopping beforehand!


Step 1: Invest in interior fireplace paint


The inside of your fireplace needs to be as heat resistant as possible, given that it needs to withstand the heat of a fire burning inside it. If you’re looking for interior fireplace paint, Brick-Anew’s firebox paint is the perfect solution for you. 


Step 2: Prepare to paint the fireplace interior


If the fireplace has been used before, there is probably dust and soot inside the fireplace that needs to be cleared before you start on your painting project. Put a projective sheet down to make sure no dust escapes onto the clean surfaces. If there is any nearby furniture, make sure this is also covered. 

A great way to get rid of any foreign matter is to use a vacuum. Vacuuming the inside of your fireplace before painting is the most effective way to prime the firebox before giving it a deep clean.


Step 3: Deep clean the inside of your fireplace


After you’ve finished vacuuming, it’s time to give the firebox a deep clean. This is usually a mucky process, so make sure you use a good pair of gloves to protect you against the dirt as much as possible. 

It’s much easier to use a spray bottle to wet the inside of your firebox. You can also use soap such as dishwashing liquid to make sure your firebox is as clean as possible. Use an old but effective scrubbing brush to get the job done properly. 

You can use a towel to dry the inside of the firebox or wait until it’s completely air dried before you start painting.


Step 4: Paint the inside of your fireplace


Make sure you cover any areas you don’t want to get paint on using painter’s tape before you start painting. This will give you a cleaner finish when you’re done. 

Depending on the size of your fireplace, use a paint roller to cover the larger areas of the firebox. You can always fill in the smaller spaces with a paintbrush. 

Most paint manufacturers recommend using two coats of paint when painting the inside of your fireplace. However, this is up to you. If the paint job looks good after just one coat then feel free to leave it! 

Always remember to leave your paint job overnight to allow the fireplace interior fireplace paint to dry sufficiently before you use it again. 


The Finishing Touches 


If you loved doing your own interior fireplace painting, you may want to consider doing the rest of your fireplace too! Brickanew has an awesome range of paints suitable for any fireplace project. Check out our fireplace paint products at Brick-Anew’s online store and start getting inspiration for breathing new life into your home’s fireplace. 

Brick Fireplace Paint Kit Brick Fireplace Paint Kit 5.0 (158 reviews) A versatile kit for painting brick fireplaces a fresh and modern look at economical prices From $229 View product

Need some more inspiration? Our fireplace painting guide will offer you tips and tricks on how to nail fireplace color schemes as well as the best ways to get the most out of your fireplace paint. 

Choosing The Right Fireplace To Match Your Home Decor

Everyone loves a fireplace. Not only do they warm you up during the colder months, but they are great to look at. They become a central part of the room and are great for home decor as they catch the eye of anyone who walks into it. However, there are so many different types of fireplaces available for installation it can be hard to choose the right one.

One of the best ways to help you decide which fireplace is the one for you is by matching it to your home decor and aesthetic. However, in order to do this, you need to consider a few things first: 


The size of the room


The first thing you need to consider when choosing a new fireplace for your home is the size of the room it’ll be installed in. Not everyone has space for an elegant new fireplace with a large stone surround, so you will need to work with what space you do have. 

Of course, if you have space, this opens you up to many more options, and you can move on to the next part of the considerations. However, if your room is on the smaller side, you can still consider other options, such as a portable or electric fireplace. 


The design of the house


The design of your house is just as important as the decor you have when considering the type of fireplace you want to install. For example, if you have a newly refurbished home with a modern appeal, you’ll want a fireplace that matches that. You don’t want something like red brick installed in a home with marble tabletops and white tiled flooring. 

Similarly, if you have a more rustic home, then you wouldn’t want a natural stone fireplace made out of marble. Of course, you can opt for anything you want, but you want something that reflects your home’s current design for the best look. 


An electric fireplace?


If you have a smaller room or want something that is easily customizable, you may want to consider an electric fireplace from the beginning. They come in many shapes and sizes, and you can easily find one that will match your home decor. 

Electric fireplaces have many benefits that sometimes outweigh the hassle of installing an entirely new wood-burning fireplace. They only need to be near an electrical outlet to turn on, and they provide just as much heat in the winter. Electric fireplaces are also easier to maintain, pose fewer risks, and are more environmentally friendly. 


Make sure it’s fit for purpose


When you’ve narrowed down the type of fireplace you want in your home, you need to consider what it will be used for. Some people install a fireplace in a room simply because they want more heat in the winter months. However, others install a fireplace purely for the aesthetics and how it can brighten up an area. 

If you want a new fireplace for its heat, you need to be sure you’re installing one that can heat up the desired area. For example, a small electric fireplace may not heat up an open space living and dining room but rather a bedroom. You may also want something grand like natural stone if you are focusing on the aesthetics. 


What features meet your demands?


A fireplace isn’t just the place where a fire is made; it actually comes with a wide range of other features. For example, you may want a mantel to display some of your favorite ornaments and family pictures. If you plan on using the fireplace every night, then you may need somewhere nearby to store your wood as well.

There are a lot of features to consider, and you need to be sure that the fireplace you choose can support the features you need. It is also a good idea to consider your budget and try not to go over it before the installation has even started. 


If unsure, consult a professional

There are so many things to consider when looking for a fireplace to match your home decor, and it can sometimes be a bit overwhelming, especially if you haven’t had a fireplace before. Luckily, tons of experts out there can help you and answer any of your questions. 

Brick Anew has a wide selection of fireplaces and accessories, and the experts of Brick Anew are always here to help. If you have a question about any of our products or what one will best fit into your home and match your home decor, all you have to do is get in touch. 

Brick Fireplace Paint Ideas To Transform Your Space

A fireplace is the central feature of any living space and it should be treated as the star of the show. What better way to make the fireplace pop than with a great color scheme? When you use color on a key feature in the room, it ties the scheme of the rest of the place together, giving your home the sophistication you’re looking for while echoing your personal style and taste. 

In this post, we’re going to look at some great fireplace color ideas that will transform any room into a space you can be proud of. There are so many ways to accent your fireplace so that it becomes a talking point of the room, from mantel accents to painting the chimney a different color. The key is to have fun with it and let your style shine through. Check out our fireplace color ideas here! 


White-painted mantel


If you want to brighten up a space and take full advantage of a room’s natural light, a white color scheme is definitely the way to go. White has a calming effect on the rest of the room and creates a warm and cozy atmosphere when lit, contrasting with the orange and yellow flames. 

Painting the mantel white invites the opportunity to play with contrasting and complementary colors alike. It’s also a great way to highlight decorative pieces that sit on top of the mantel like family photos, ornaments, or artwork. 

Brick Anew’s Frosted Sunshine paint kit is a fantastic example of the colors you can use in a white-driven design. The scheme naturally reflects more light, making the room look brighter and adding a calming effect – perfect for a relaxed space like a lounge area. 


Color matching


Matching the fireplace color to another key feature of the room is another great way to decide on a color scheme for the fireplace. For schemes such as Brick Anew’s Misty Harbor, consider the colors that feature in the rest of the room. Misty Harbor combines light to medium gray with cream undertones, which means it won’t overpower the space but will invite the room’s attention. 

Brick Fireplace Paint Kit Brick Fireplace Paint Kit 5.0 (158 reviews) A versatile kit for painting brick fireplaces a fresh and modern look at economical prices From $229 View product

Larger items such as doors, rugs, and sofas make spectacular contrasting or matching points for the fireplace or just the mantel. If you want your fireplace to pop, avoid color-matching it with the walls and the floors. This will make it fade into the rest of the room due to a lack of contrast. 

For brighter colors, or matt black consider matching the color to smaller items that accent the same color. Think about pillows, artworks, indoor plants, or decorative artifacts that contain colors you love. When you take the plunge and paint your fireplace to match these items, you’ll be amazed at how color coordination can liven up a room.


misty harbor


Pastel Green and neutral tones


House plants are becoming the new pets of the home, and loads of people are bringing more and more greenery indoors. The dark green of leaves works well in spaces that have a neutral color scheme in the home. If you’re someone who has a lot of plants in your space, you can go one of two ways when you choose a fireplace color. 

A color scheme like Twilight Taupe will work well in a space with a lot of greenery as colors such as tans, browns, and beiges almost mimic the plants’ natural environments. It’s a great way to invite nature and serenity into the home. 

When a feature piece of a room is a certain color, the human eye is naturally drawn to other items in the room that are similar or the same colors. Using a toned-down pastel green will, therefore, highlight the plants in your living space – perfect for anyone who sees themselves as a plant parent! 


Sleek matte black


For those who love a sleek, modern flair in their homes, a matte back paint color on your fireplace will bring a dramatic dynamic to the room. Make sure you avoid any glossy effects when picking out your black paint. You want the fireplace to be a bold feature, but gloss can make the space look tacky. 

Matte black is a great way to make the fireplace the focal point of the room and works especially well when contrasted with light, neutral-colored walls. It is also especially cozy when there is a fire burning. If you go with a sleek matte black scheme, try to limit incorporating other colors into the feature. This can lead to overly-complicated color coordination which may detract from the intended atmosphere of the room. 


grey fireplace


Brightly painted mantel


Are you all about those beautiful, bright colors that emanate joy and fun into a space? Own it by painting your mantel a funky, bright color. When you opt for a bright color scheme, you have full permission to experiment and go a little crazy with featuring colors. 

Any interior designer will recommend using a color wheel to make sure your chosen color ties in well with the rest of the room. For example, if you have artwork in the space that has reds, yellows, burnt oranges, or even a deep cerise, be bold and try one of these out as fireplace colors. If you’re seeking inspiration, check out other pictures of painted fireplaces that go big on bright colors and see if they would work for you and your style. 


Calming blue


Using blue as a fireplace color or in your chimney painting ideas is an excellent play on color contrast. According to the color wheel, blue and orange are complementary colors, which means blue paint works well on a fireplace, as it complements the color of the flames when lit. This enhances the fireplace as a feature. 

However, in the warmer months, blue also creates a calming feeling in the room. According to color psychology, blue is the color of serenity and relaxation which many people love to have in their living spaces. A home should be a place where you can feel safe and calm and incorporating blue into the space can have this effect. What better way to highlight a color than painting your fireplace in it? 


Which scheme appeals to you? 

At the end of the day, the fireplace color you choose has to reflect your style. More importantly, the color has to make you happy! If you’re really stuck or simply overwhelmed with fireplace color ideas, look no further than Brick Anew and our fireplace products. We’re more than happy to offer expert advice and help to bring all of your amazing ideas together. The most important thing to remember is interior decorating needs to be fun and your projects should always be true to you. 

How To Clean A Stone Fireplace, Including Soot

A stone fireplace can completely transform a room, from the smooth finish to the sleek design of the stones. However, this can be completely ruined if there is a surface build-up of soot and grime. Not only is it not very aesthetically pleasing to the eye, but it can actually cause harm to your health if not cleaned up quickly. 

Luckily, cleaning a stone fireplace isn’t hard, especially when you have the right tools and products. Here at Brick-Anew, we’ve put together a comprehensive guide to help you get your stone fireplace looking sparkling clean so that you can be proud of it again. 


What specialist cleaner should you use?


Many cleaning solutions are advertised on the internet, telling you that they are the best at cleaning stone fireplaces. However, they can’t all be the best. While some people may have a preference for one over the other, we have the ultimate specialist cleaner that will help you keep your fireplace in tip-top shape.

The Brick Anew Brick and Stone Fireplace Cleaner is a professional solution designed to penetrate and remove any form of soot, dirt, and grime on the surface of your stone fireplace. It has been made with natural, non-harmful ingredients, which makes cleaning stone easier than ever before. 


Step-by-step guide for cleaning your stone fireplace


Using Brick Anew’s specialist cleaner, you can remove any soot and grime from your fireplace in just a few simple steps: 


1. Prepare your fireplace for cleaning 

Before you start using the Brick Anew cleaner and deep scrub your stone fireplace, you need to get the whole area ready. To start, you’ll need to sweep up any loose dust and soot from the floor surrounding your fireplace, as well as the inside of your fireplace. 

Once all the excess dirt has been removed, you’ll then need to cover the hearth with a tarp or another form of protective material. This will protect your floors from any loose Brick Anew cleaner, soot that is falling off, or warm water that you use later on. It is a good idea to seal it down with duct tape, so it doesn’t move.


2. Put on protective equipment 

While the Brick Anew cleaner doesn’t have any harmful chemicals, you still don’t want to get it in your eyes or any cuts. That’s why you’ll want to put on some gloves and goggles before you start the deep cleaning of your stone fireplace. Make sure that it all fits and that there aren’t any holes in the protective equipment.


3. Start spraying the Brick Anew cleaner

The first thing you want to do when you start the deep cleaning process is to spray the Brick Anew cleaner all over your stone. Unlike other solutions, this product already comes in a spray bottle, so you don’t need to transfer it. Be sure that you have sprayed the solution evenly on all the stones and that there aren’t any spots that you’ve missed.


4. Wipe the solution on the stones

Very quickly after you’ve sprayed the Brick Anew cleaner on the stones of your fireplace, you’ll want to use your hands to massage it all over. This will ensure every inch of your stones is covered in the solution and prepared for the next step. Make sure you’ve kept your gloves on for this step.


5. Start scrubbing

This is the most important and sometimes the most fun part. You will need a scrubber brush and start massaging the Brick Anew cleaning solution even deeper into the stone. Move the solution around with the brush using a circular motion to ensure you get every bit of dirt and grime off the surface.


6. Rinse with a sponge

Grab a bucket of warm water and a sponge for the last step when cleaning your stone fireplace. Dip your sponge in the warm water and wipe off the excess Brick Anew cleaning solution from the stone on your fireplace. Once done, your area should look almost brand new. 


How often should you clean your stone fireplace?


How often you clean your stone fireplace will depend on how often you use it. For example, if you only light a fire in it twice a year, there won’t be as much build-up of dirt and grime as someone who uses it every night. Therefore, it’s always a good idea to keep an eye on how your fireplace looks and make a logical decision about whether it needs to be cleaned. 

However, if you are someone who uses your fireplace regularly, then you should probably clean it at least once a month. If there is around ¼ inches worth of soot on the stone, then it is time for it to have a scrub down.


Can soot on my stone fireplace be harmful?


Many don’t realize, but soot is actually a very harmful substance, and it’s why it should be removed from your stone fireplace on a regular basis. While it isn’t great to look at, it also has the potential to become dangerous to your health. This is because soot is a carcinogen, and this is a substance that increases your risk of developing cancer and other diseases that affect your nervous system.

You probably can’t avoid soot gathering in your fireplace, but you can prevent it from gathering enough that it will harm your health. That is why it is important to stay on top of cleaning to ensure everyone in the house is safe. 


What else should you consider?


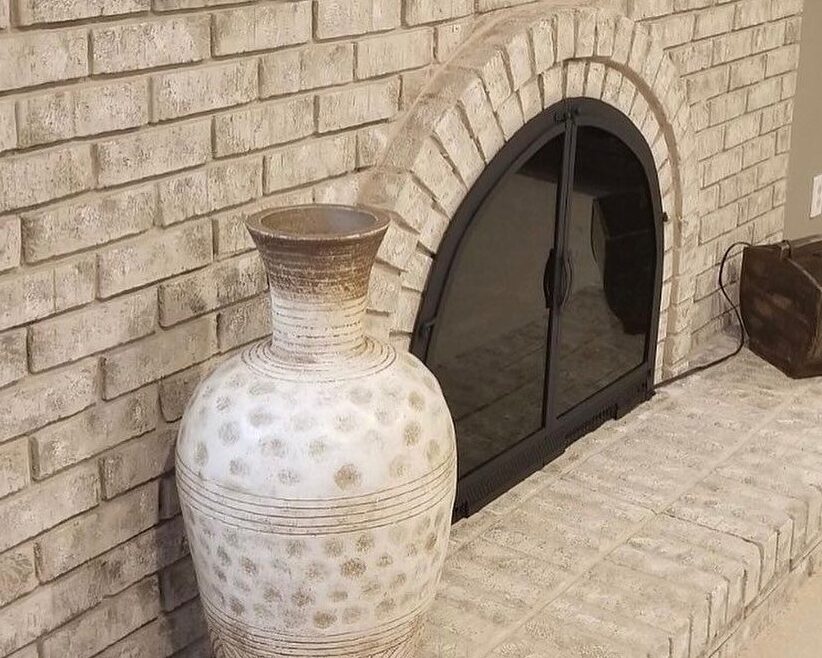
Fireplace door


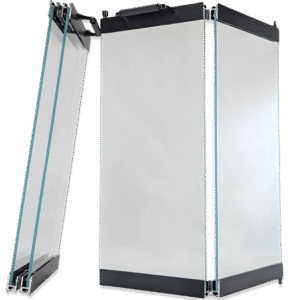
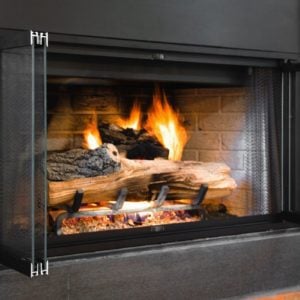
A door is a fantastic addition to any stone fireplace, which isn’t just because they look good. They actually play a great role in ensuring that shooting flames and embers don’t make their way out of the fire pit. While it may not protect the inner stones of your fireplace, it protects those that sit outside. 

If you don’t have a fireplace door already, you should definitely get one. Brick Anew has a wide range for you to browse and shop from. You can also have them custom-built to ensure they fit your fireplace. They come in different brands, shapes, and sizes and will protect your fireplace from soot for years. 


Paint


If you have painted stone or have been thinking about painting the stone surrounding your fireplace, you may be happy to know it can also protect the area from dirt and soot. The paint acts as a barrier between the stone and grime, making it much easier to remove when you start cleaning. 

However, you need to ensure the paint is of high quality and has been applied properly. If you’re unsure where to get paint or the right tools, you can browse Brick Anew’s selection of fireplace paint. There are even sets that provide you with everything you need to ensure the job is done right. 


Final thoughts


Many people who use their stone fireplaces on a regular basis often forget that they need to clean them as well. Once it is installed, you just want to light fires for warmth and not deal with the upkeep. However, it is extremely important, and when you have the right tools and cleaning solution, it isn’t hard at all. 

With regular cleaning, you will be able to have fires roaring in your fireplace for as long as possible.

How To Clean Soot Off Brick Fireplaces

A brick fireplace is a fantastic addition to any home. They often look cozy and rustic, providing the room with a great deal of warmth you can get comfortable with while watching your favorite television show. However, while they are stylish, they can lose their shine when there is a build-up of soot and grime. 

Not only does soot not look great, but it can also be harmful to your health. When you see that it is starting to cling to the bricks on your fireplace, you know it’s time to clean. But there are quite a few things you may want to know before you get started. 


Getting your fireplace ready to clean


A brick fireplace shouldn’t be cleaned if it has just had a fire burning. This is because your bricks will heat up, making it harder and more uncomfortable to clean. Instead, you should let your fireplace cool down for at least 12 hours before you even start getting it ready to clean. 

Once your brick fireplace is cool, you need to remove any loose ashes and soot inside and around the area. It will make the deep cleaning and scrubbing process much easier. From there, you’ll need to place some protection on your floors around the fireplace and put on gloves and goggles. You’re then ready to go. 


What products are best to use?


  • Baking soda

That’s right. Baking soda isn’t just used for making cakes and other baked goods. It is actually a great cleaning solution when mixed with water and is better than some standard soaps. This is because it is a mild alkali that helps any dirt and grime dissolve in water as you scrub the bricks. 

  • Vinegar

Similar to baking soda, vinegar isn’t just used for cooking. Instead, it can help remove all that unwanted soot from your fireplace bricks. The only difference is that vinegar is highly acidic, which can dissolve various kinds of dirt, including some species of bacteria. You can find vinegar as an ingredient in some popular brands of cleaners as well. 

  • Trisodium phosphate (TSP)

While TSP may not be as easy to get your hands on as the last two cleaners, it is definitely worth it when you do. This chemical compound is mixed with water and is known to cut right through soot, grease, and other types of dirt. It is extremely strong and should be used with caution and the right protection. 

  • Brick Anew Fireplace Cleaner

Brick Anew’s Brick and Stone Fireplace Cleaner may not be something you can bake and cook with, but it certainly cleans just like you want it to. This professional solution will penetrate even the toughest of soot and residues. It doesn’t contain any harmful ingredients and will make cleaning an easy task. 


Guide to using Brick Anew cleaner


Ready to clean your fireplace and remove all the soot and grime? Let’s use the Brick Anew cleaner as an example of what you have to do:

  1. Spray some of the Brick Anew cleaner on your soot-covered bricks evenly. 
  2. Wearing gloves, rub the solution into your bricks using your hands, spreading it all over.
  3. Allow the solution to sit for around 10 minutes so it really soaks into the bricks. 
  4. Use an abrasive brush and scrub the solution off the bricks in a circular motion.
  5. Grab a sponge and some warm water and remove the excess cleaning solution from the bricks. 

Once done, all the soot should be removed from your bricks and look good as new. However, if there are extra deep layers of dirt and grime, it may take more than one cleaning session to remove it completely. 


Brick Stone Fireplace Cleaner


Tools for cleaning soot off brick


When you clean soot off your brick fireplace, no matter what cleaning solution you use, there are some tools you’ll need to have ready to use:

  • Broom and dustpan: To sweep up any excess dust and ash before getting started.
  • Vacuum: To get rid of dust and ash from harder-to-reach areas.
  • Spray bottle: Something to place your cleaning solution into so you can evenly spread over the brick. Brick Anew’s solution already comes in a spray bottle.
  • Bucket: To fill up with warm water for the final steps.
  • Sponges: To wipe the warm water over the bricks.
  • Scrub brush: To scrub the cleaning solution into the bricks to remove the soot.


Spot clean any blemishes


Even when you’ve followed our steps on removing soot from a brick fireplace, there may still be some difficult-to-remove spots that won’t seem to budge. However, there is no need to worry because there are some extra steps you can take to ensure any remaining bits of soot or stains are removed from your brick. 

All you have to do is create a mixture of baking soda and water, which will turn into a paste. Place it on all the stubborn soot spots and leave it there for around 10 minutes. You should then use a small toothbrush to scrub it off and rinse it with a warm sponge. 


Tips to keep it clean in the long run


Of course, you can’t completely avoid soot forming on your brick fireplace, but there are a few things you can do to prevent it from building up quickly:


Add a fireplace door


A door is a fantastic addition to any brick fireplace, which isn’t just because they look good. They actually play a great role in ensuring that shooting flames and embers don’t make their way out of the fire pit. While it may not protect the inner bricks of your fireplace, it protects those that sit outside. 

If you don’t have a fireplace door already, you should definitely get one. Brick Anew has a wide range for you to browse and shop from. You can also have them custom-built to ensure they fit your fireplace. They come in different brands, shapes, and sizes and will protect your fireplace from soot for years. 


Using the proper paint will go a long way


If you have painted bricks or have been thinking about painting the bricks surrounding your fireplace, you may be happy to know it can also protect the area from soot. The paint acts as a barrier between the brick and soot, and it makes it much easier to remove any dirt and grime when you start cleaning. 

However, you need to ensure the paint is of high quality and has been applied properly. If you’re unsure where to get paint or the right tools, you can browse Brick Anew’s selection of fireplace paint. There are even sets that provide you with everything you need to ensure the job is done right. 


Final thoughts


Soot is something that isn’t easily avoidable when you have a brick fireplace, however, it is something that can be maintained. If you let the soot and grime build up over time, it will be harder to remove in the long run and can also be dangerous for your health. 

Cleaning your brick fireplace and removing soot can be quick and easy with the right tools and cleaning solution. Just follow this guide and use Brick Anew’s products, and you’ll be set for each cleaning session.

How to Remove Paint From a Brick Fireplace


Painting over a brick fireplace is an easy way to give a room a spruce. But what happens when you’re buying a new home or redecorating, and that paint doesn’t match the look you’re hoping to achieve? Lying underneath that paint may be a beautiful brick centerpiece just waiting for you to dig it out and put your personal touch on it.

Thankfully, with a handful of materials and some DIY spirit, brick fireplace paint removal may make all the difference. Whether you want to paint your fireplace another color or restore it to its near-original condition, we’re here to help.  


Before You Tackle Fireplace Paint Removal


Problems With Painting a Brick Fireplace


Before you roll up your sleeves and dive in, there are a few things you should know. There are a few reasons you might decide to paint over your brick fireplace rather than remove the old paint. One of the most concerning is the presence of lead paint. Unfortunately, it’s impossible to look at the paint and determine definitively if it contains lead or doesn’t.

So, to start, you’ll want to carefully remove a small section of the old paint and test it with a lead testing kit. Lead-based paints were banned in 1978 for residential use, so if your home was built after this date, you can probably skip this step. Otherwise, you can pick up a lead paint test kit from Home Depot, Lowe’s, Walmart, or a similar store.

Until your test kit comes back clean, avoid chipping or sanding the paint. Doing so can shoot lead particles into the air, which can cause health problems. If your fireplace is coated in lead paint, brick fireplace paint removal may not be your best bet. It may be easier to use something like our stone fireplace paint kit to paint over it.

Alternatively, you can call a professional abatement company to deal with the lead paint. Another problem you may run into is that the previous owner painted over the brick to seal it against moisture or conceal damaged or cracked bits of the surface. Unfortunately, you won’t know if that’s the case until after you remove the paint, but you should be aware that damage may add extra steps.


Preparing Your Work Area


Once the lead paint check is complete, the next step in brick fireplace paint removal is prepping your work area. This includes gathering the materials you’ll need and protecting surrounding surfaces and yourself. This project may get messy, but you can minimize cleanup by taping down drop cloths or thick plastic sheets in your work area.

Having drop cloths in place when you start will make it easier to collect the paint as it flakes and peels away from your brick fireplace. It’ll also prevent any stray drops of paint stripper from damaging your flooring. But it doesn’t end with drop cloths and painter’s tape. Here is a full list of the tools you’re likely to use during your brick fireplace paint removal project:

  •   Drop cloths and plastic sheeting
  •   Painter’s tape
  •   Stiff-bristled wire brush or steel wool
  •   Putty knife
  •   Five-in-one tool
  •   Gel-based paint stripper (roughly one gallon per 75 square feet)
  •   All-purpose cleaner
  •   Trash bags
  •   Work gloves
  •   Protective eyeglasses
  •   Respirator mask(s)


Safety Considerations


Now, a few notes on safety. When you’re doing a brick fireplace paint removal project or removing paint of any kind, it’s important to protect your face and hands. Paint chips, particles, dust, and other debris may be flaking off with impressive force, and you don’t want any of it to land in your eyes or to breathe them in. This is where the glasses and mask come in.

The work gloves will protect your skin from the chemicals in the paint stripper. Be careful not to touch your face with your gloved hands while you work. You’ll also want to keep the area well-ventilated while you work.


How Do You Remove Paint From A Brick Fireplace?


With your tools gathered, your work area prepped, and your safety gear firmly in place, you’re ready to start your brick fireplace paint removal. By this point, we know the paint is lead-free, and your drop cloths are in place, protecting the floor and surrounding walls.

Step 1: Empty the room of items that may take on the smell of the paint stripper. Use plastic sheeting to cover any furniture you don’t want to move.

Step 2: Using an all-purpose cleaner, scrub away any dirt or soot on the surface of your fireplace. A clean surface will make it easier to strip the paint.

Step 3: Apply your paint stripper in thick layers. We picked a gel paint stripper for your brick fireplace paint removal project because it’s better for vertical surfaces. It sticks better and is easier to apply in thick coats rather than thin ones that dry too quickly. Check the label to see how long the stripper should sit before it’s time for the next step. It will likely be somewhere around four hours.

Step 4: Use your putty knife to test the paint. It should be thick and goopy and easy to remove. Scrape the paint off in small sections, dumping the old paint deposits into a nearby trash bag until the top layer is gone.

Step 5: Apply another thick coat of your gel paint stripper over the fireplace’s surface, letting it sit for the amount of time listed on its label.

Step 6: Use the putty knife to scrape off the second coat of paint. Then, scrub any remaining bits off with your brush or steel wool.

By the time you wrap up step six of your brick fireplace paint removal project, you’ll have a better idea of what’s been hiding underneath the surface. Now, you can decide if you like the way it looks and want to add some new fireplace accessories to complete your look or if you prefer to choose a new color for your good-as-new fireplace.

How to Paint A Stone Fireplace


Supplies You’ll Need


When you’re getting ready to paint a stone fireplace, you’ll want to be careful about the type of paint you’re purchasing. Stone paint updates the color while keeping the look of real stone. This way, you’re not flattening it out. Your fireplace gets a facelift while maintaining its character.

In addition to stone paint, you’ll need:

  •   Painter’s tape
  •   A drop cloth or an old sheet
  •   A fireplace cleaner or mild liquid dish soap mixed with warm water
  •   A good scrubbing brush
  •   Paintable acrylic latex caulk (if there are cracks too big to be painted over)


Step 1: Prepare the Work Area


Preparing the work area is simpler than it sounds. Simply gather your supplies, clear the area of any decorative items, wood, tools, or fireplace screens, and use painter’s tape and drop cloth to section off any areas that need protecting. Tape the drop cloth to the floor around the fireplace to avoid drips. You’ll also want to tape around the mantel.


Step 2: Clean the Fireplace’s Surface


Next, you’ll want to break out your cleaner and brush and scrub the surface of your fireplace. Once it’s dry, check for cracks. Small ones are fine to paint over, but bigger ones will need to be filled in with the caulk we mentioned. If you have to fill some larger cracks before breaking out the stone paint, give the caulk enough time to dry before moving on to the next step.


Step 3: Choose Your Paint


As we mentioned earlier, it’s important to choose paint for stone, not just any ordinary paint. You can apply stone paint over previously painted stone just as easily as over stone that’s never been painted before.

Our stone fireplace paint kit contains everything you need to quickly transform your old fireplace into something new. In the kit, you’ll find base coat sealer, paint, a paint brush and tray, rollers, a sponge, and painter’s tape. Everything is pre-tested and pre-mixed, so it’s ready to use.

Your color options include:

  • Frosted sunshine: a mix of tan, gray, and yellowish cream that works well with other light colors and makes bold colors pop.
  • Misty harbor: a mix of light and medium grays with a subtle touch of cream that works well with gray carpeting or furniture and other cool color tones.
  • Twilight taupe: a mix of taupe, tan, beige, and cream that resembles natural sandstone. Easy to match to most color and décor schemes.  


Step 4: Paint the Fireplace


Now we’re getting to the good stuff! Your fireplace is prepped and clean, and you have your color. All that’s left to do is seal and paint. Pour some base coat sealer into your paint tray, dip and coat your roller evenly, and then work the roller over the fireplace’s surface from top to bottom. Use a brush to cover edges, corners, and tight spaces.

The sealer will help prevent your paint from soaking in and drying unevenly. It’ll also help prevent the old color from bleeding through and protect against rusting and peeling. Once your sealer is completely dry, follow the same steps with your stone paint; roll from the top down, use a brush to cut in around edges, cover corners, and dab into tight spaces.

For optimal results, paint for stone may require two coats. Allow your first coat to dry before you evaluate the color.


Step 5: Clean Up


Congratulations! You’ve upgraded your living space and saved thousands on renovations. But you’re not finished just yet. While it may be tempting to leave the cleanup for later, the longer painter’s tape stays on, the harder it is to remove. Remove it cautiously at a 45-degree angle so it doesn’t damage your fresh paint.

Once the mantel is clear, do the same for your drop cloths. Handle them carefully, as they may have globs of paint on them. Lastly, close up and put away your paint cans and wash your brushes and tools with warm, soapy water, rinsing them thoroughly to preserve them for future projects.

Now that that’s out of the way, you can kick back and enjoy that fireplace!

4 Fireplace DIY Projects You Can Do Over a Weekend

Having a fireplace in the living room or den is a plus for many homeowners, but sometimes an outdated design can create more problems than pleasant, cozy feelings. Thankfully, there are ways you can give your prefab or masonry fireplace a quick facelift without having to spend a fortune.

Benefits of Refreshing Your Fireplace

In most layouts, the fireplace serves as the focal point of the room. That means it could make or break the interior style and decor choices you’ve made. By refreshing the facade, you can create a significant impact on the entire room and improve the feel of your home without much effort. Even if you only change the exterior color, you have the option to create a brighter feeling with lighter tones or make an accent wall with a bolder hue. It all simply depends on how you want to improve the space.Making cosmetic changes to your fireplace can also increase the value of your home. The National Association of Realtors conducted a study where participants rated fireplaces as one of their most desired features. In fact, 40% said that they would pay extra for a house that included one in a living space. Making updates could be vital if you plan to sell soon or want to borrow against your equity in the form of a loan. A more visually appealing fireplace could help to increase the value of your home, meaning you might receive more capital if you are looking to finance another renovation project or make a quick sale in a competitive housing market. 

No matter if you have owned your home for years or have just purchased it, updating your fireplace is a good home improvement project that can be completed in a few short days. Below are four of our favorite DIY projects that can give your fireplace a quick and easy makeover. 

fireplace painted white with decorated mantel

1. Paint It a New Color

Masonry or stonework can be a great feature and design characteristic for the home. However, if the color of the stones or bricks doesn’t naturally match anything else in your house, you may want to consider painting them a different color. While this might sound like an intimidating project, it can be quickly accomplished in a few steps.

Misty Harbor Fireplace
Before painting, you have to prepare the surface of your fireplace. This means you’ll need to thoroughly clean it to remove any built-up dust, grime, or soot. Using warm water and cleaning spray, wash the areas you are going to paint. Make sure to rinse again with clean water and that the surface is dry before continuing.

Once that step is complete, it’s time to move on to painting your bricks or stones. You’ll need a base coat, a few different accent colors, and a glaze. After deciding on a color, you can use a paint kit to purchase all of the necessary materials in one transaction. You may also want to get some paint for the firebox if it is looking chipped or faded. 

To prevent making any messes, tape off areas and lay down drop cloths to protect the floor. Then you can start painting your fireplace with the base coat and adding more colors after the first complete layer. Using a variety of tones gives your fireplace dimension and a more natural look. 

2. Replace Outdated or Damaged Doors

Besides painting, you can also give your fireplace a new look by replacing the glass doors. This update is beneficial if your current doors are unfashionable or have any scratches or cracks. If the glass is damaged, you may want to replace them as soon as possible to avoid safety concerns when using the fireplace. Scratches or cracks in the glass weaken the integrity of the doors. Depending on how damaged the glass is, it could shatter while in use, creating a mess and even a fire hazard. Imperfections can further create an eyesore for your otherwise pristine fireplace. To replace the doors, you need to measure their dimensions and figure what type of fireplace you have, whether it’s masonry or prefab. With that information, you can order new fireplace doors that better fit your interior design and are safer for the home.

prefab doors

3. Install a New Mantel

Fireplace mantels come in a variety of shapes and sizes. Some may only be a wooden shelf, while others could include a decorative surround and stonework. Depending on the style of your home, your mantel could be due for an overhaul that will better match your intended aesthetic. 

Harrison Mantel Surround
Over the recent years, wooden mantels have become popular for their varied designs and affordability. Most wooden mantels are typically made from attractive hardwoods that can be painted or stained depending on your preference. You could purchase a completed mantelpiece from a home improvement store or find a vintage one at a salvaged lumber yard.

For a more hands-on approach, you can even build your own mantel with cheap materials like pine boards and wood veneers. You simply create a hollow wooden box that will be stained and installed over the existing one, giving the fireplace a new look for less time and money!

fireplace with shelves on both sides

4. Add Extra Storage with Shelving 

As a homeowner, you may be on the lookout for ways to create extra storage space throughout your house. Fortunately, your fireplace makeover could include building new shelving to hold books, collections, or even household odds and ends.

If your fireplace is in the center of the wall, you probably have room on either side of it. Instead of leaving that wasted wall space empty, you can create built-in bookshelves or even an entertainment center. This design accommodates additional storage for your living space and can spark new ways to decorate your home. An out-of-style fireplace doesn’t have to hold back your interior design dreams. By taking a few days to give it a quick update with paint or a new mantel, you can make your old fireplace match any style. 

Katie & Boo’s Fireplace Makeover

WATCH: New homeowners Katie & Boo transform their old brick fireplace into the centerpiece of their living room using Brick-Anew.

When Katie first called us, we knew that her husband, Boo, was skeptical about painting over their brick fireplace.

Which, I might add, is totally understandable. Preserving and restoring old brick can make for a great aesthetic, and there’s enough nauseating pictures of poorly painted fireplaces floating around the web to make someone nervous about giving it a shot. But if Katie wants the modern, updated look of painted brick, and Boo wants to keep the look of natural brick, is there a solution?Yes, there is. This is a situation we’ve heard a thousand times at Brick-Anew. And with our fireplace paint kit, you get the best of both worlds!

Take a look at the beautiful results they achieved with our Twilight Taupe color scheme:

Items Featured In Video

[woodmart_shortcode_products_widget show=”product_ids” hide_free=”0″ show_hidden=”0″ include_products=”2973, 3956″]

BEFORE

Old Brick Fireplace Before Painting with Brick-Anew

AFTER

Fireplace painted with Brick-Anew Twilight Taupe color
One of the best parts about Twilight Taupe is how it opens up the room while still complementing dark, warm tones like wood and leather. Katie and Boo’s fireplace is the perfect example of this. Apparently it also makes the perfect backdrop for the family photo!Thank you Katie & Boo for sending in this great video. The best part about Brick-Anew paint is the freedom of the process, and we love seeing our customers having fun with it! Our kits include detailed instructions that teach you how to get the look that you want, so the finished result will be completely unique to your home.

So when it comes to painting old brick or preserving it, there really are no wrong answers. But maybe some answers are more right than others… You chose well, Katie!

Fireplace brick painted with Brick-Anew Twilight Taupe color

A Brick-Anew Painted Stone Fireplace Makeover

Who knew painted stone could look so natural?


Brick-Anew customer, Pat, purchased the twilight taupe Brick-Anew kit to remodel her outdated stone fireplace. Tired of looking at her dark stone, Pat wanted a lighter look.


Pat really wanted her fireplace to look like natural stone and not have a solid painted look. While researching some different options, she found Brick-Anew, and decided to give it a try.

“I played around with the application a bit. The paint colors in the kit looked amazing and complimented each other for a natural look.”

After Pat completed the project, her family and friends couldn’t believe the dramatic change.

“Some people thought we’d changed out the stone. They really couldn’t believe it was painted! I’m very happy with the kit and my new fireplace.”

Pat, we’re impressed! You did a great job.


Pat's fireplace before using Brick-Anew

Before using the Brick-Anew Stone Fireplace Paint Kit

Pat's fireplace after using Brick-Anew

After using the Brick-Anew Stone Fireplace Paint Kit

The Ultimate Guide To Painting Your Brick Fireplace

For some of us, we get a warm cozy feeling when we think about our fireplace.

Roasting marshmallows with the family. A glass of wine by the fire after a long day.  Cozying up with a warm blanket and a book, watching the dancing flames. For others, we get a creepy eerie feeling thinking of the dark structure lurking in the corner of our living room. Never enjoyed by anyone. Just sitting there taking up space.

You’ve lived with that drab outdated brick for years, not knowing how to make it better.  No matter how you’ve tried to decorate your room…there it is. Heavy. Looming. Depressing.

That dingy “Brady Bunch Brick” was groovy in the 1970’s…

70's Fireplace Brick

But today…not so much.  It’s time to consider getting rid of that ugly brick once and for all and give your fireplace a facelift with –

You guessed it… paint!

Painting your brick is a fast, easy way to get a fresh new look without ruining your budget. Whether your ugly outdated brick is a wall in your kitchen or a fireplace in the middle of your living room, paint can be just the thing for a quick facelift.  It’s cheaper than any other remodeling option and what have you got to lose by giving it a try? You can always choose another remodeling option if you don’t like the painted look.

Still not convinced?  Read on and maybe you’ll be inspired to tackle that fireplace painting project you’ve put off for so long……

Why Paint Your Brick Fireplace?

Are you asking yourself, “Why in the world should I paint my brick fireplace?”  Here are some reasons to help you think through your decision:

1. Painting your brick is quick, easy and you get immediate results. 

Even if you’re not a DIY pro, painting brick is not a project that requires a lot of skill.  Grab a paintbrush and a can of paint and you’re off and running. If you’re in a hurry to complete the project, painting a brick fireplace can be done pretty quickly unless your brick wall or fireplace is extremely large.  Even then, it shouldn’t take more than a couple of days to finish. Depending on what kind of paint project you decide on (there are several options), you might need additional materials, but we’ll get to that a little later. As soon as you start applying the paint to your brick, you’ll see immediate results.  That feeling of “Why didn’t I do this a long time ago?!? There’s something satisfying about the immediate gratification you feel about covering up ugly brick that just makes you smile.

2. You can do it yourself without having to hire a contractor.

Painting your brick is a project you can do yourself without having to hire expensive contractors.  Professionals could charge anywhere from $500 – $2000, depending on the complexity of the project. But this article is here to show you that paying a professional to paint your brick is so unnecessary because the project is so simple. With the proper tools and paint, it’s possible to make your fireplace look as if it was painted by a professional while spending less than a quarter of a contractor’s price.

THERE IS MORE ON THIS ARTICLE HERE: FIREPLACE PAINTING 

Yvonne’s Story: A Brick Fireplace Makeover Testimonial

Color Used: Twilight Taupe

Take a look at this beautiful fireplace that home renovation specialist, Yvonne,  from Phoenix Arizona, sent us after using the Brick-Anew paint system.

This is how the fireplace looked before. Yvonne’s client was sick and tired of the dark, speckled brick and wanted to make a change without spending a fortune. Yvonne had used Brick-Anew before so she knew just what to do.

img_3830

I chatted with Yvonne last week and  here’s what she had to say:

“I work in the home remodeling industry and my Brick-Anew project turned out really great. I will definitely use it again. The homeowner wanted to replace the fireplace brick with stone but it was really expensive. I talked her into trying Brick-Anew since it was a much cheaper option. She used the money she saved on other projects in the house. We decided that worst case, it’s just paint. What did we have to lose? My client ended up loving the new look. The project worked out perfectly!!”

We love getting feedback like Yvonne’s.  Saving her client money and creating a beautiful fireplace makes her look like a rock star!  One of the best things about the Brick-Anew kit is that it’s so much less expensive than other options home renovators might consider like tearing out the brick and replacing it with stone or a different color brick.  You can see other customer testimonials here.

Brick fireplace remodeling can be the perfect solution for a drab, dark room with an ugly brick fireplace.  A brick fireplace makeover will change the entire look and feel of a room and make it look lighter and brighter instantly.

[woodmart_products post_type=”ids” columns=”1″ include=”2973″ sale_countdown=”0″ stock_progress_bar=”0″ highlighted_products=”0″ products_bordered_grid=”0″ lazy_loading=”no”]

Beautiful, Affordable DIY Fireplace Makeover

We feature lots and lots of fireplace makeovers on the Brick-Anew blog, and there’s a reason for that–we love ’em! (more…)

How to Build Wood Mantels

There are so many different ways to improve the look of your fireplaces and mantels. But often the best way to achieve the look you want is to do it yourself. (more…)

Classic and Creative Fireplace Makeovers

At Brick-Anew, we love fireplace makeovers!  My personal favorites are makeovers that feature the Brick-Anew paint kit.  But I have a true affection for all things fireplace makeover, so I knew I had to share this post chock full of ideas for new looks for your favorite fireplace. (more…)

Tips for Spring Cleaning Your Fireplace

With weather beginning inch its way to spring time, it’s just about time to break out the cleaning supplies, and get started on polishing up your home in time for the official start of Spring.

Spring Cleaning Tips for Your Fireplace

The number of “spring cleaning” projects on my list this year keeps mushrooming, but one the biggest tasks I have to tackle is cleaning the fireplace after a long winter of being closed in and burning wood.

I think the fireplace is one of the toughest jobs of all because it is one of the dirtiest places in a home. Ashes, soot, stains—these are all items on the list to be tackled so I can check the fireplace off of my list. The cleaning project I am referring to here is NOT the chimney. Personally, I would not venture to do conduct my own safety inspection, I prefer to bring in the “professionals” to clean my chimney. On my list are the firebox, the fireplace doors, and any soot or stains on the brick.

It’s important for you to make certain you get your chimney inspected once each year. Many people opt for the Fall season, before they begin using their fireplaces frequently. There’s no reason you can’t have this service performed in the Spring, instead.

But the spring cleaning chores I am referring to are more of a deep clean of the fireplace surround, hearth pad and the inside of your fireplace and firebox.Handy tools for you to gather when preparing to “spring clean” your fireplace

  • Drop cloth
  • Large bucket
  • Stiff bristled nylon brush
  • Metal trash can
  • Shop Vac vacuum
  • Warm water
  • Cleaning supplies
  • Bleach and TSP
  • Vinegar and baking soda for a natural approach
  • Rags or towels that you don’t mind getting dirty
  • Protective mask, eyewear, and gloves

Let’s get started

-First remove the log holder, andirons and any other tools from the fireplace area.
To clean them quickly, you could take them outside and hose them off to clean them.
Scrubbing the tools and accessories gently should get most of the dirt and grime off.
You can also try a non-flammable metal polish to clean them to a shine if you like.

-Next, carefully scoop out any built up and loose ash and place it in a metal trash can. You can use either a Shop Vac or a vacuum to life the rest of the ash up and out of the fireplace area.

-Take the nylon brush and use it to loosen and scrape off and of the gunk that is stuck to the walls and the bottom of the fireplace. You can also use your Shop Vac to
clean up this debris, too.

-Create a solution to clean the surfaces. To do this, combine 1 gallon of warm water with 1 cup of bleach and 6 tablespoons of TSP. Then put on protective rubber gloves, and use the solution to scrub the walls, surround and floor of your fireplace.

-Next, rinse the fireplace surfaces with a wet cloth, rinsing in between with water for best results.

-If you’re interested in using a more natural cleaning solution, then mix a half warm water and half white vinegar solution. To be successful with the water and vinegar solution will require a lot more elbow grease—you’ll need to scrub harder to get the surfaces clean. To use this more natural solution, spray the mix on all of the surfaces of your fireplace, avoiding wood or any surface that can be damaged by water. Let the solution sit for 5 to 10 minutes, then spray it again, and scrub with a nylon brush. You may need to repeat this step more than once to get the results you want.

Once this process is complete, dissolve a few tablespoons of baking soda in water, and wipe down the same fireplace surfaces with the baking soda solution to help neutralize the vinegar.

-To clean the glass fireplace doors takes just a few squirts of dishwashing detergent like Dawn, to a bucket of warm water, OR add a cup of vinegar to a gallon of water. I’ve found that cleaning the glass with the soapy water first, then once dry wiping it down with the vinegar solution is the most thorough method here.

-Wipe any residue away with newspaper, which is lint-free.

-To clean the mantel, wipe with a damp cloth to remove dust. If your mantel is wood, you can use a wood polish to add luster and freshly-cleaned shine. You may also want to consider dusting and freshening up your mantel decor.

That’s it, pretty simple, really! Now all we have to do is find the time to tackle this chore and get our fireplaces ready for Spring!

Love DIY? Check Out These Gorgeous DIY Projects

I read a lot of blog posts and connect with lots of bloggers over the course of a week. So when I find a post that features adorable and entirely doable DIY projects, I get excited and I want to share it. (more…)

Blog Spotlight: The Small Town Rambler

I was fortunate enough to catch up with one of our favorite bloggers this week, Karla Holley of the Small Town Rambler. (more…)

Should I Paint My Brick Fireplace?

Here’s a question we’ve learned that many folks struggle with before coming to Brick-Anew.com to purchase their brick fireplace paint kit—should I paint my brick fireplace? (more…)

Last-Minute Gift Ideas for Those Who Love to DIY

Looking for the perfect last-minute gift for someone who has “Do It Yourself” in their blood–a true DIY aficianado? (more…)

Fireplace Makeover: All Things Heart and Home

We’re very lucky here at “blog HQ” to get the opportunity to meet so many amazing people!  One of our very favorites is Robin, who fills one of our favorite blogs, All Things Heart and Home, with lots of ideas and love. In fact, Robin is in the process of completing a fireplace makeover right now, which we are very proud to be taking part in at Brick-Anew. Now let’s see what Robin has to say! (more…)

Keeping a Cement Fireplace Hearth Clean

Fireplaces provide awesome moments with family and friends.  A little extra warmth on a chilly evening, beautiful flames, and the sounds and smells of wood burning create a special atmosphere.  A dirty fireplace takes away from that atmosphere.  Painting your firebox and keeping the fireplace clean are great ways to keep your fireplace looking fresh.

The hearth, however, is often forgotten.  Many fireplace hearths are cement so they take a little extra effort to clean.  SFGate provides great directions on how to clean your hearth and how to keep it that way!

Preparation

First things first, you have to prepare.  SFGate recommends spreading old coffee grounds over the ash and soot to keep the dust down.  Cover the walls around the fireplace by taping up old newspapers or another lightweight material.  Cover the floor with a tarp or even newspapers.  If you’re going to put newspaper on the floor, secure them in place so they won’t blow away!

Open and close the damper a few times to release creosote and ash.  Sweep up all loose soil and seal it off.  You can use a metal ash can or a trash bag if you tie it off well and immediately throw it out.

Cleaning Methods and Supplies

Depending on how dirty your cement is, you can use one of three methods: oxygen bleach, trisodium phosphate, or muriatic acid.  In this article, I’ll give you an overview of each chemical and the supplies you’ll need to clean with it, head over to SFGate’s article How to Clean a Cement Fireplace Hearth for detailed cleaning instructions.how to clean your fireplace hearth

Oxygen Bleach: General Maintenance

For general maintenance, oxygen bleach will work very well.  Oxygen bleach is a powdered bleach found in laundry detergents like OxiClean.  Don’t let its familiarity fool you.  Make sure you’re taking proper safety precautions like wearing gloves and eye protection.

To clean with oxygen bleach, you’ll need:

  • about 1 cup oxygen bleach
  • two large buckets
  • a mixing stick
  • a stiff bristled brush
  • a sponge

Trisodium Phosphate: Tougher Stains

Trisodium phosphate, a white powder used for cleaning and as a food additive, is great for removing tough stains.  If oxygen bleach is general maintenance, trisodium phosphate is a deep clean.  Again, make sure you’re being careful to protect yourself and the non-cement surfaces in your home.To clean with trisodium phosphate, you’ll need:

  • 1 cup chlorine bleach
  • 6 tablespoons trisodium phosphate
  • two large buckets
  • a mixing stick
  • a stiff bristled brush
  • a sponge

Muriatic Acid: Burnt-In Stains

Muriatic acid, a less pure version of hydrochloric acid, is very powerful, and not just for cement cleaning.  Even brief contact can burn skin, and breathing in the fumes can burn the lining of the nose and lungs.  Only use  muriatic acid as a last resort.  If you are going to use it, I strongly recommend reading through Bob Villa’s muriatic acid safety article.To clean with muriatic acid, you’ll need:

  • safety supplies including acid-resistant gloves, thick clothing to cover all exposed skin, eye and face protection, and a respirator
  • about 1 cup muriatic acid
  • two buckets
  • a sponge
  • a wooden bristle brush with a long handle
  • a broom
  • proper disposal methods as listed on the container of acid

Conclusion

This article may be more intimidating than inspiring.  Cleaning cement is no easy task.  You’ll have to locate supplies, buy chemicals, and take protective measures.  Then the whole time you’re cleaning, you’ll be worrying about possibly ruining your walls or carpet or furniture.  If you take it one step at a time, the process doesn’t have to be terrible.

Don’t stress yourself by trying to complete the whole process all at once.  Take your time gathering the proper supplies and protective equipment.  Read up on different safety measures and methods for cleaning.  Most important, don’t start the cleaning process on a day where you have lots of things to do!  Pick a fairly free day so you won’t be rushed.  Take your time preparing the room so that nothing is in danger of getting dirty.  Tarps are especially nice for covering carpets and furniture; if water spills onto them, they won’t leech it onto the furniture they’re covering.

Before you start cleaning, have a plan.  Some of these processes are time sensitive.  If you want to have a break at some point, schedule it during a non time-sensitive part of the process.  Once you’re done, you may want to invest in a cement sealant to help prevent future stains.

Keep a positive spirit and ask us questions if you have any!  Happy cleaning!

Q and A With Home Staging Pro Sharon Tara

Brick-Anew recently caught up with home stager Sharon Tara, owner of Sharon Tara Transformations,  and were lucky enough to get her insight into the home staging business as well as some challenging issues she’s had to help her clients solve. (more…)